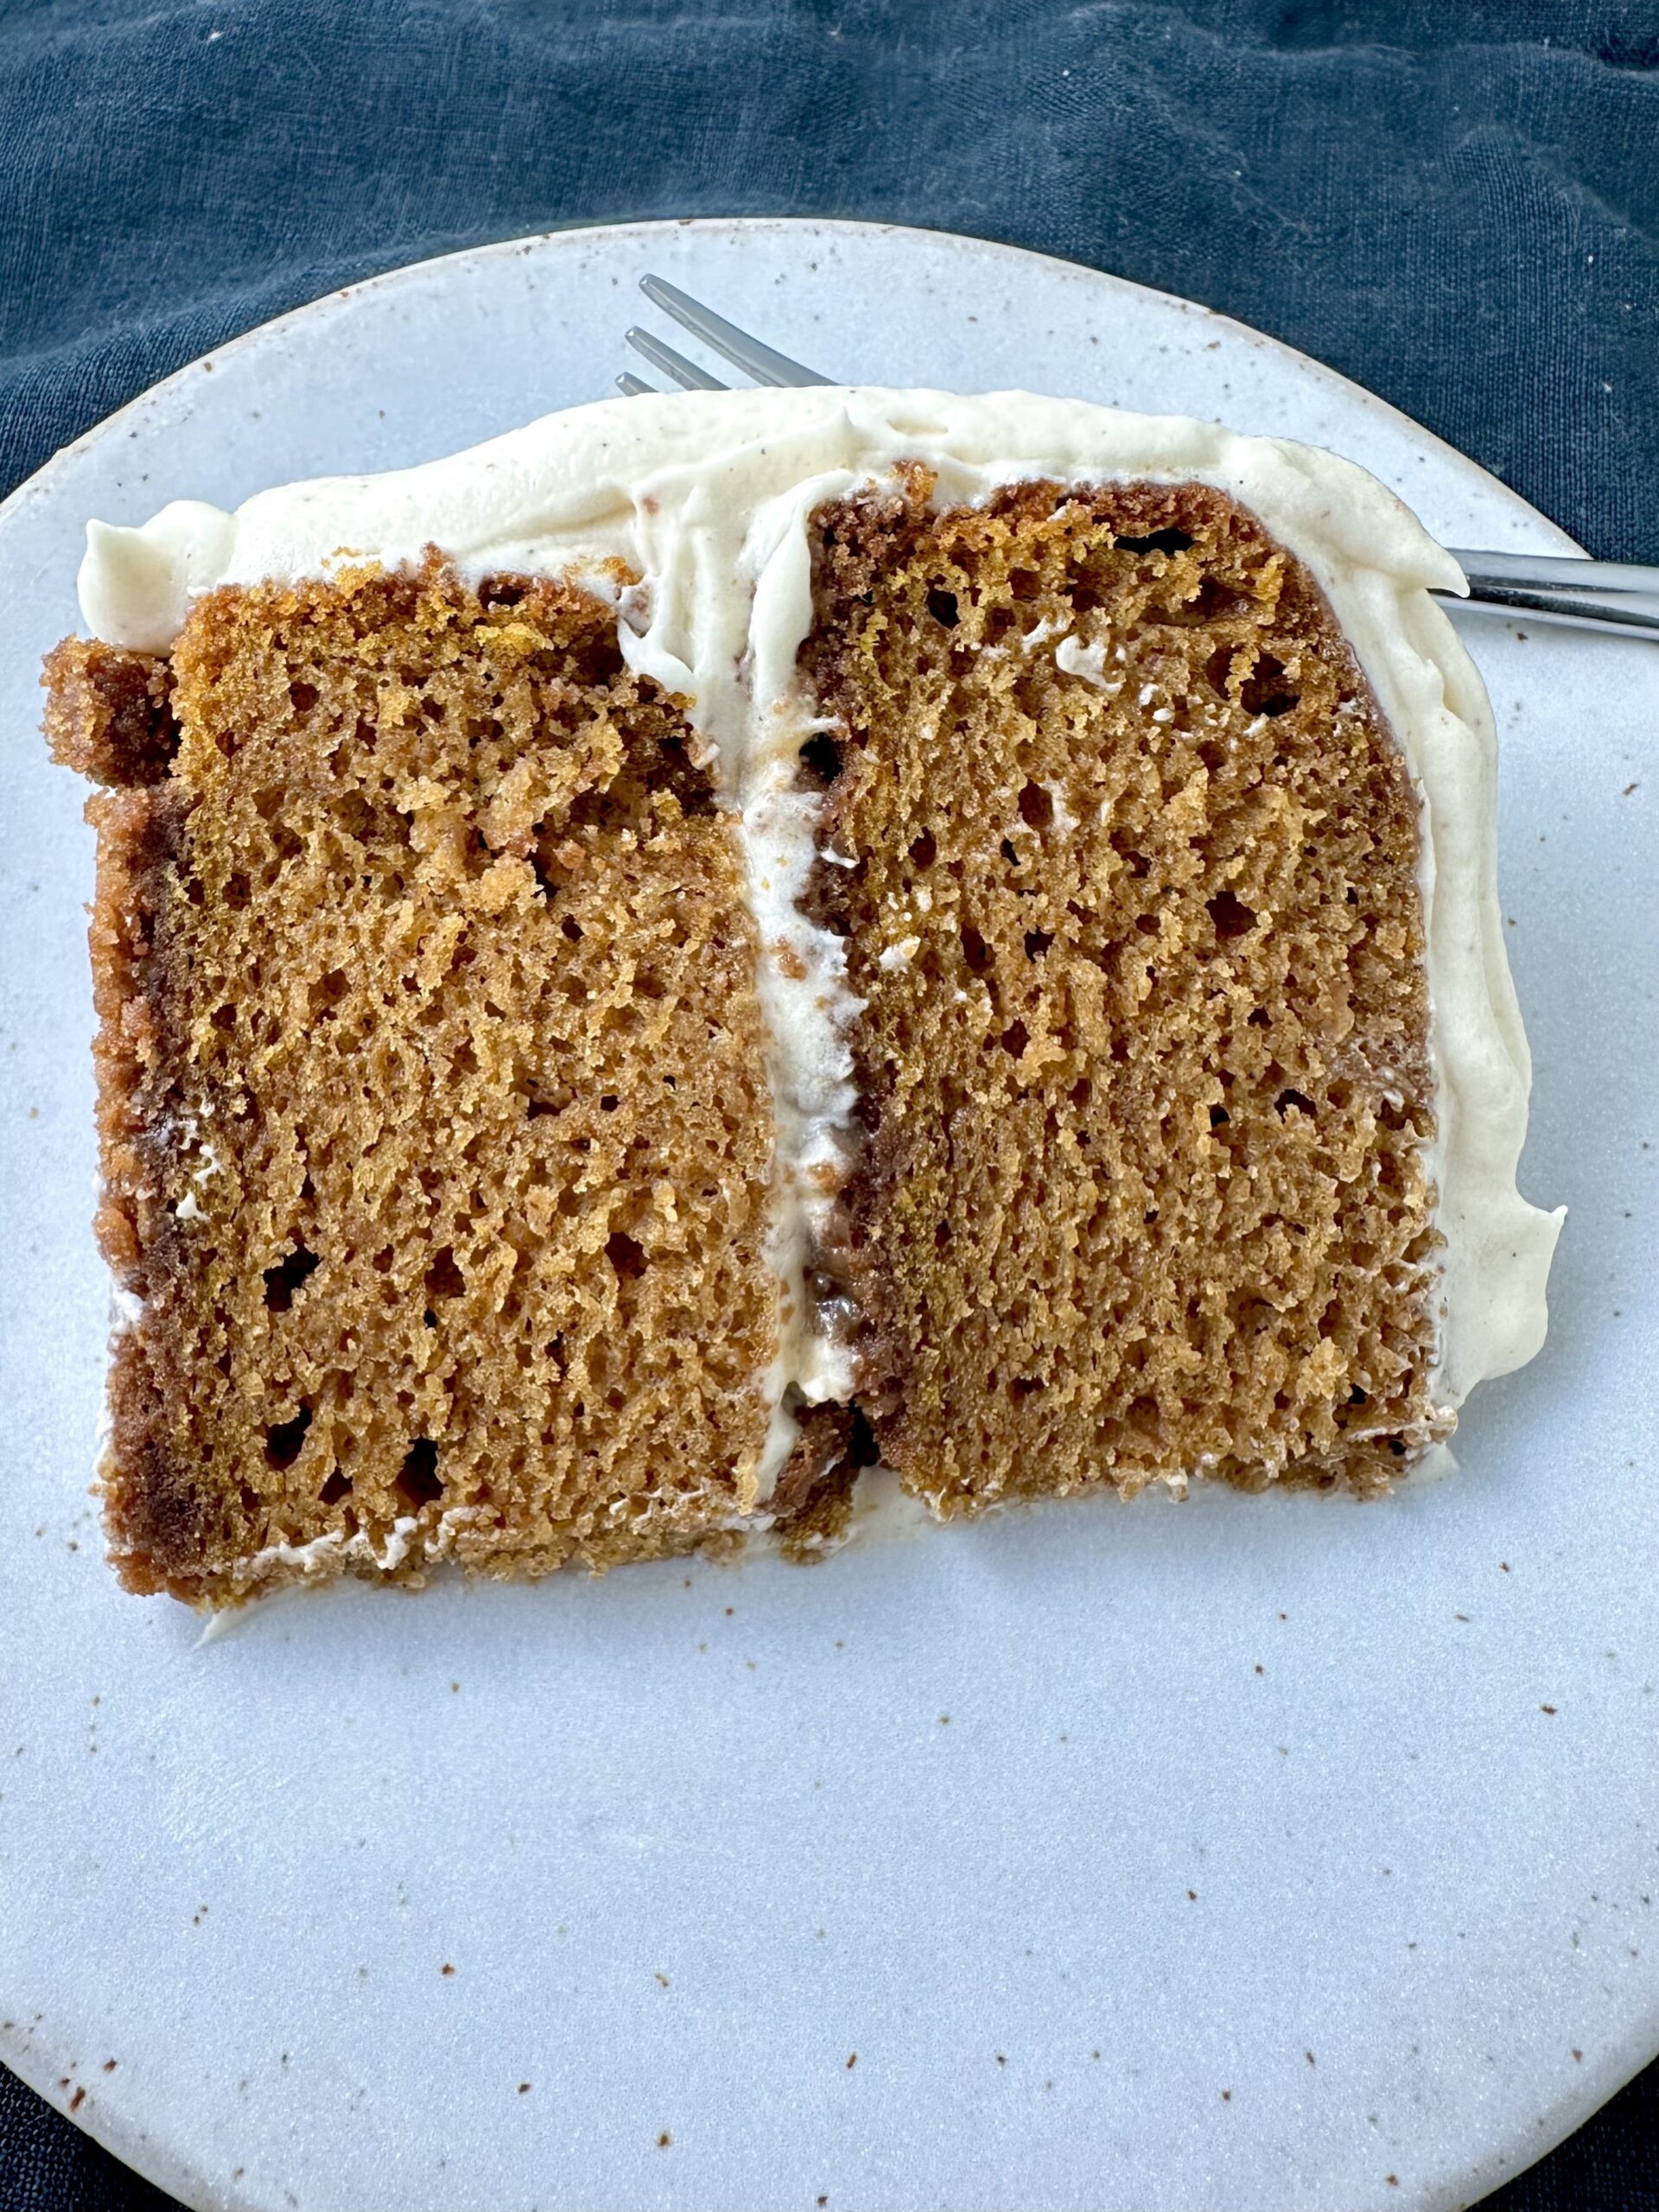
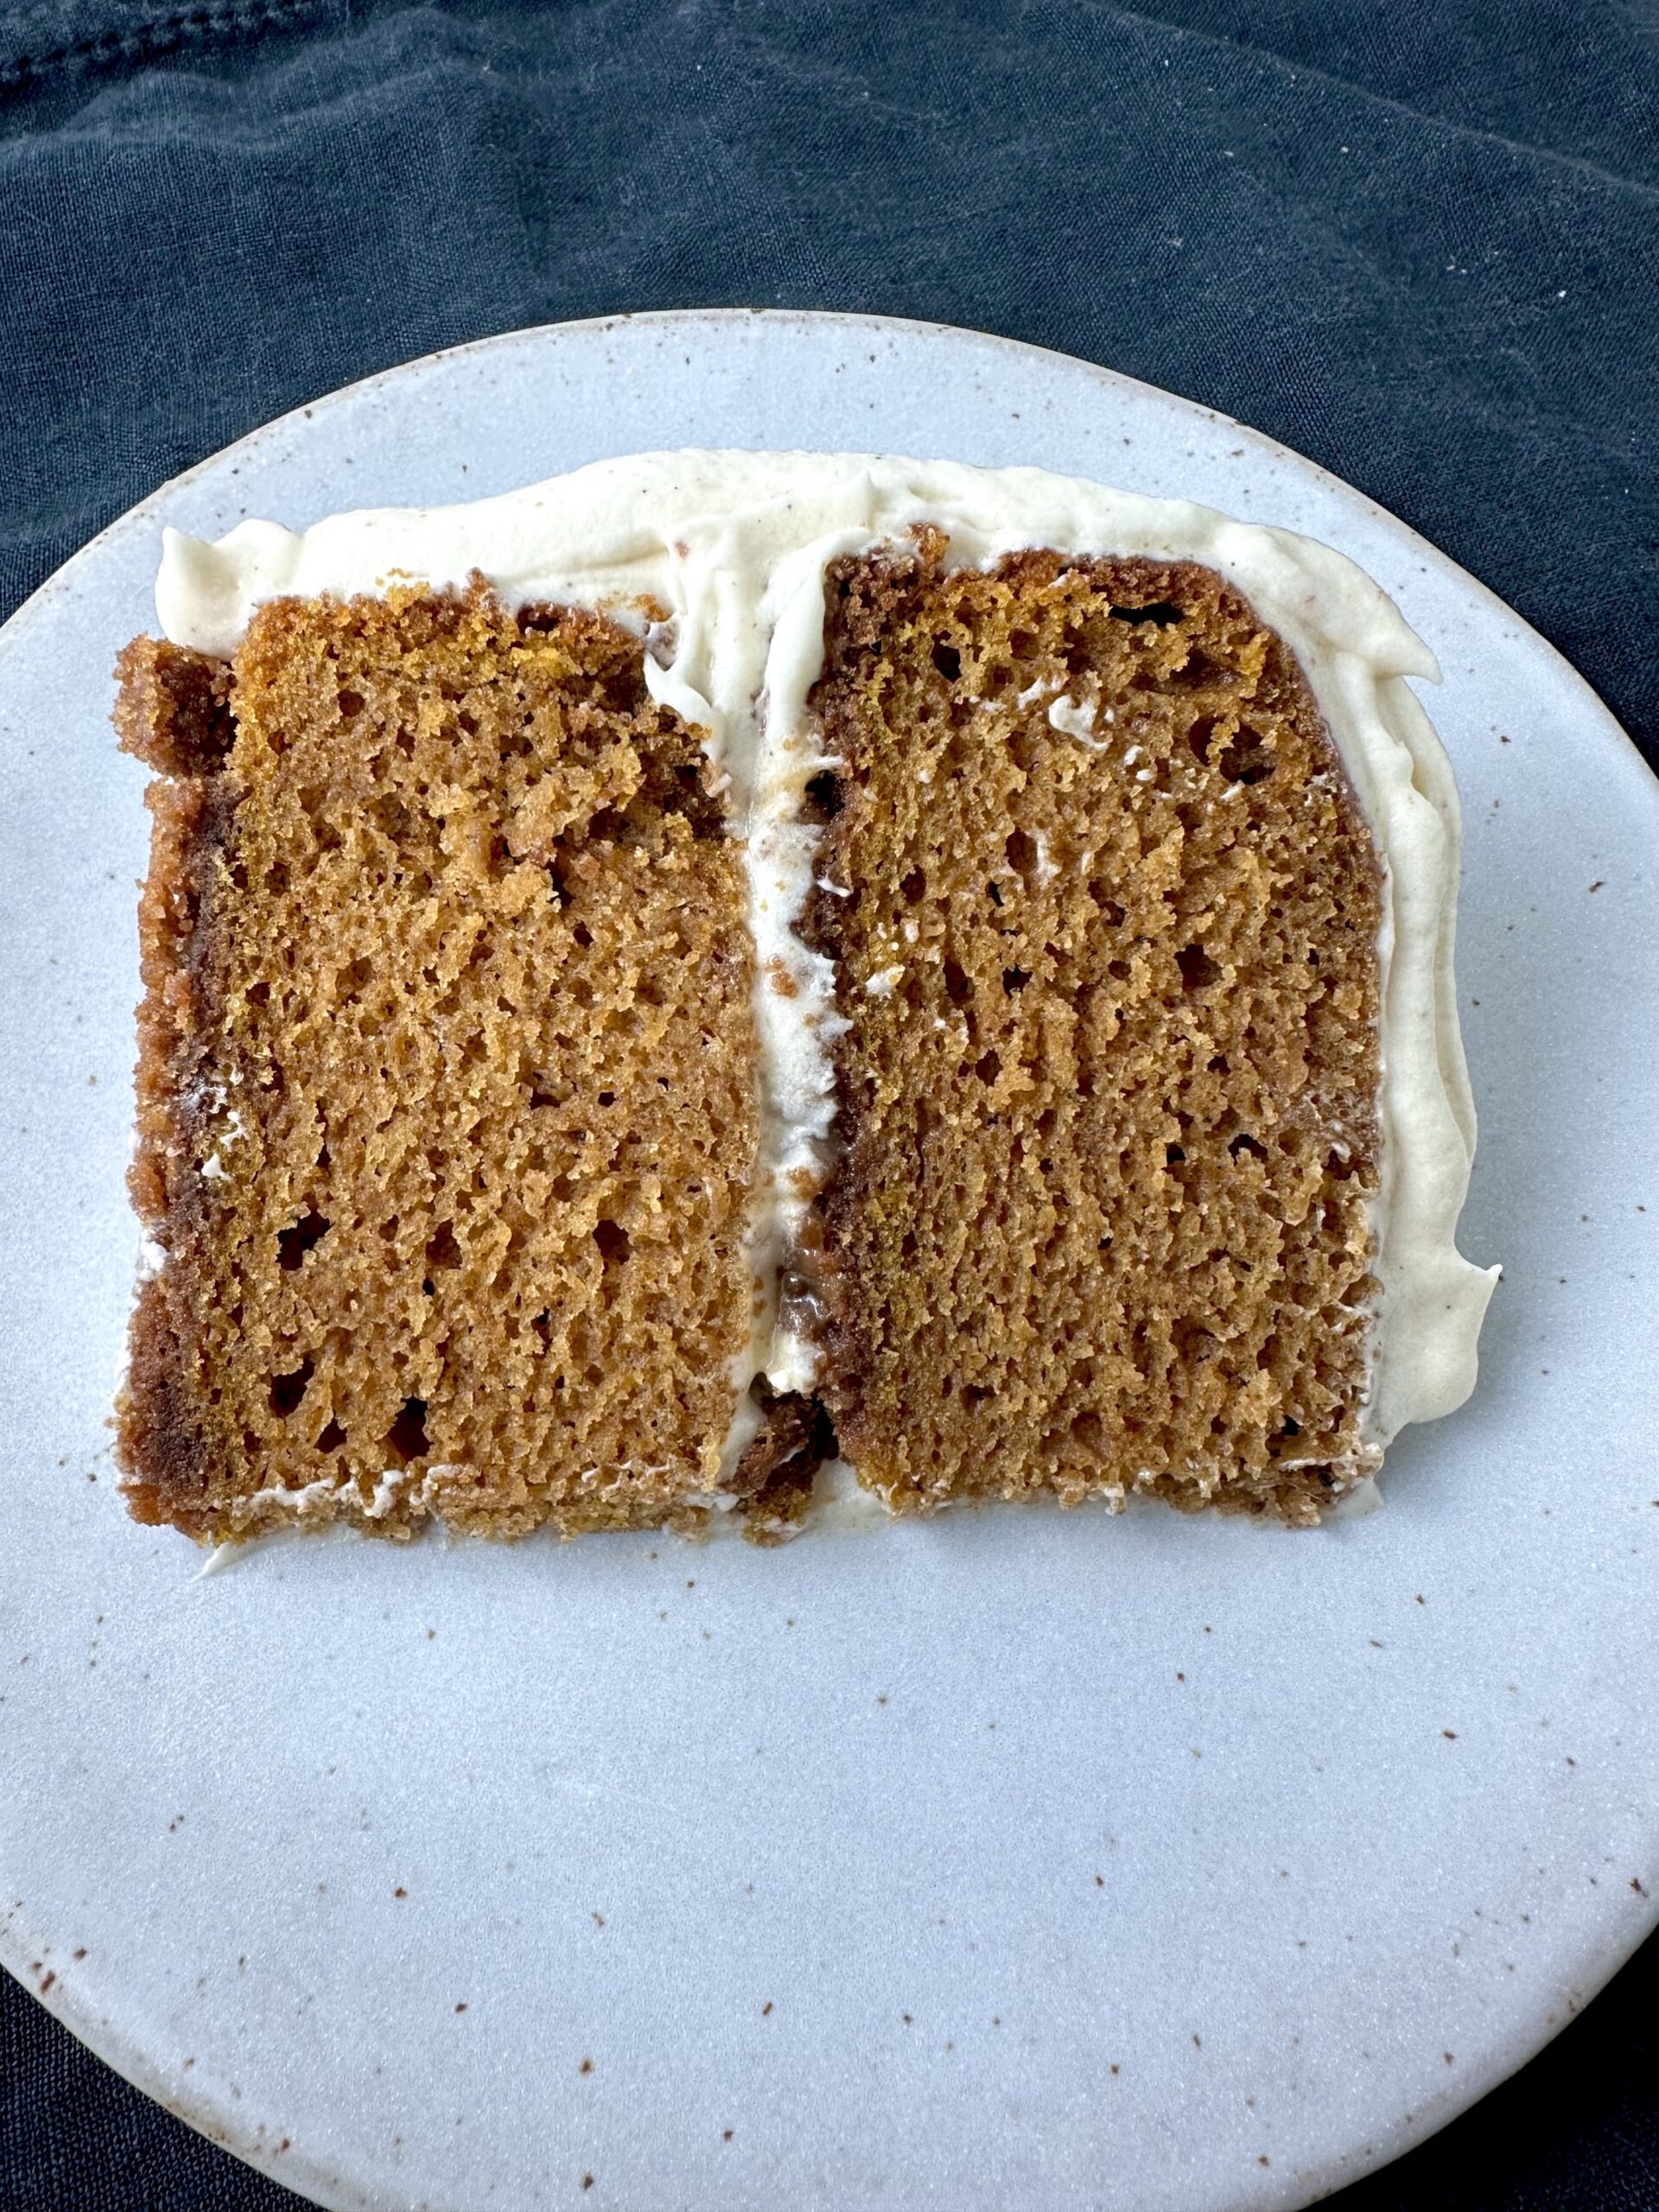
Extra moist pumpkin spice cake layers with a crunchy Biscoff cookie crust, dreamy browned butter cream cheese buttercream, and rich homemade salted butterscotch sauce. It’s the BEST cake for fall!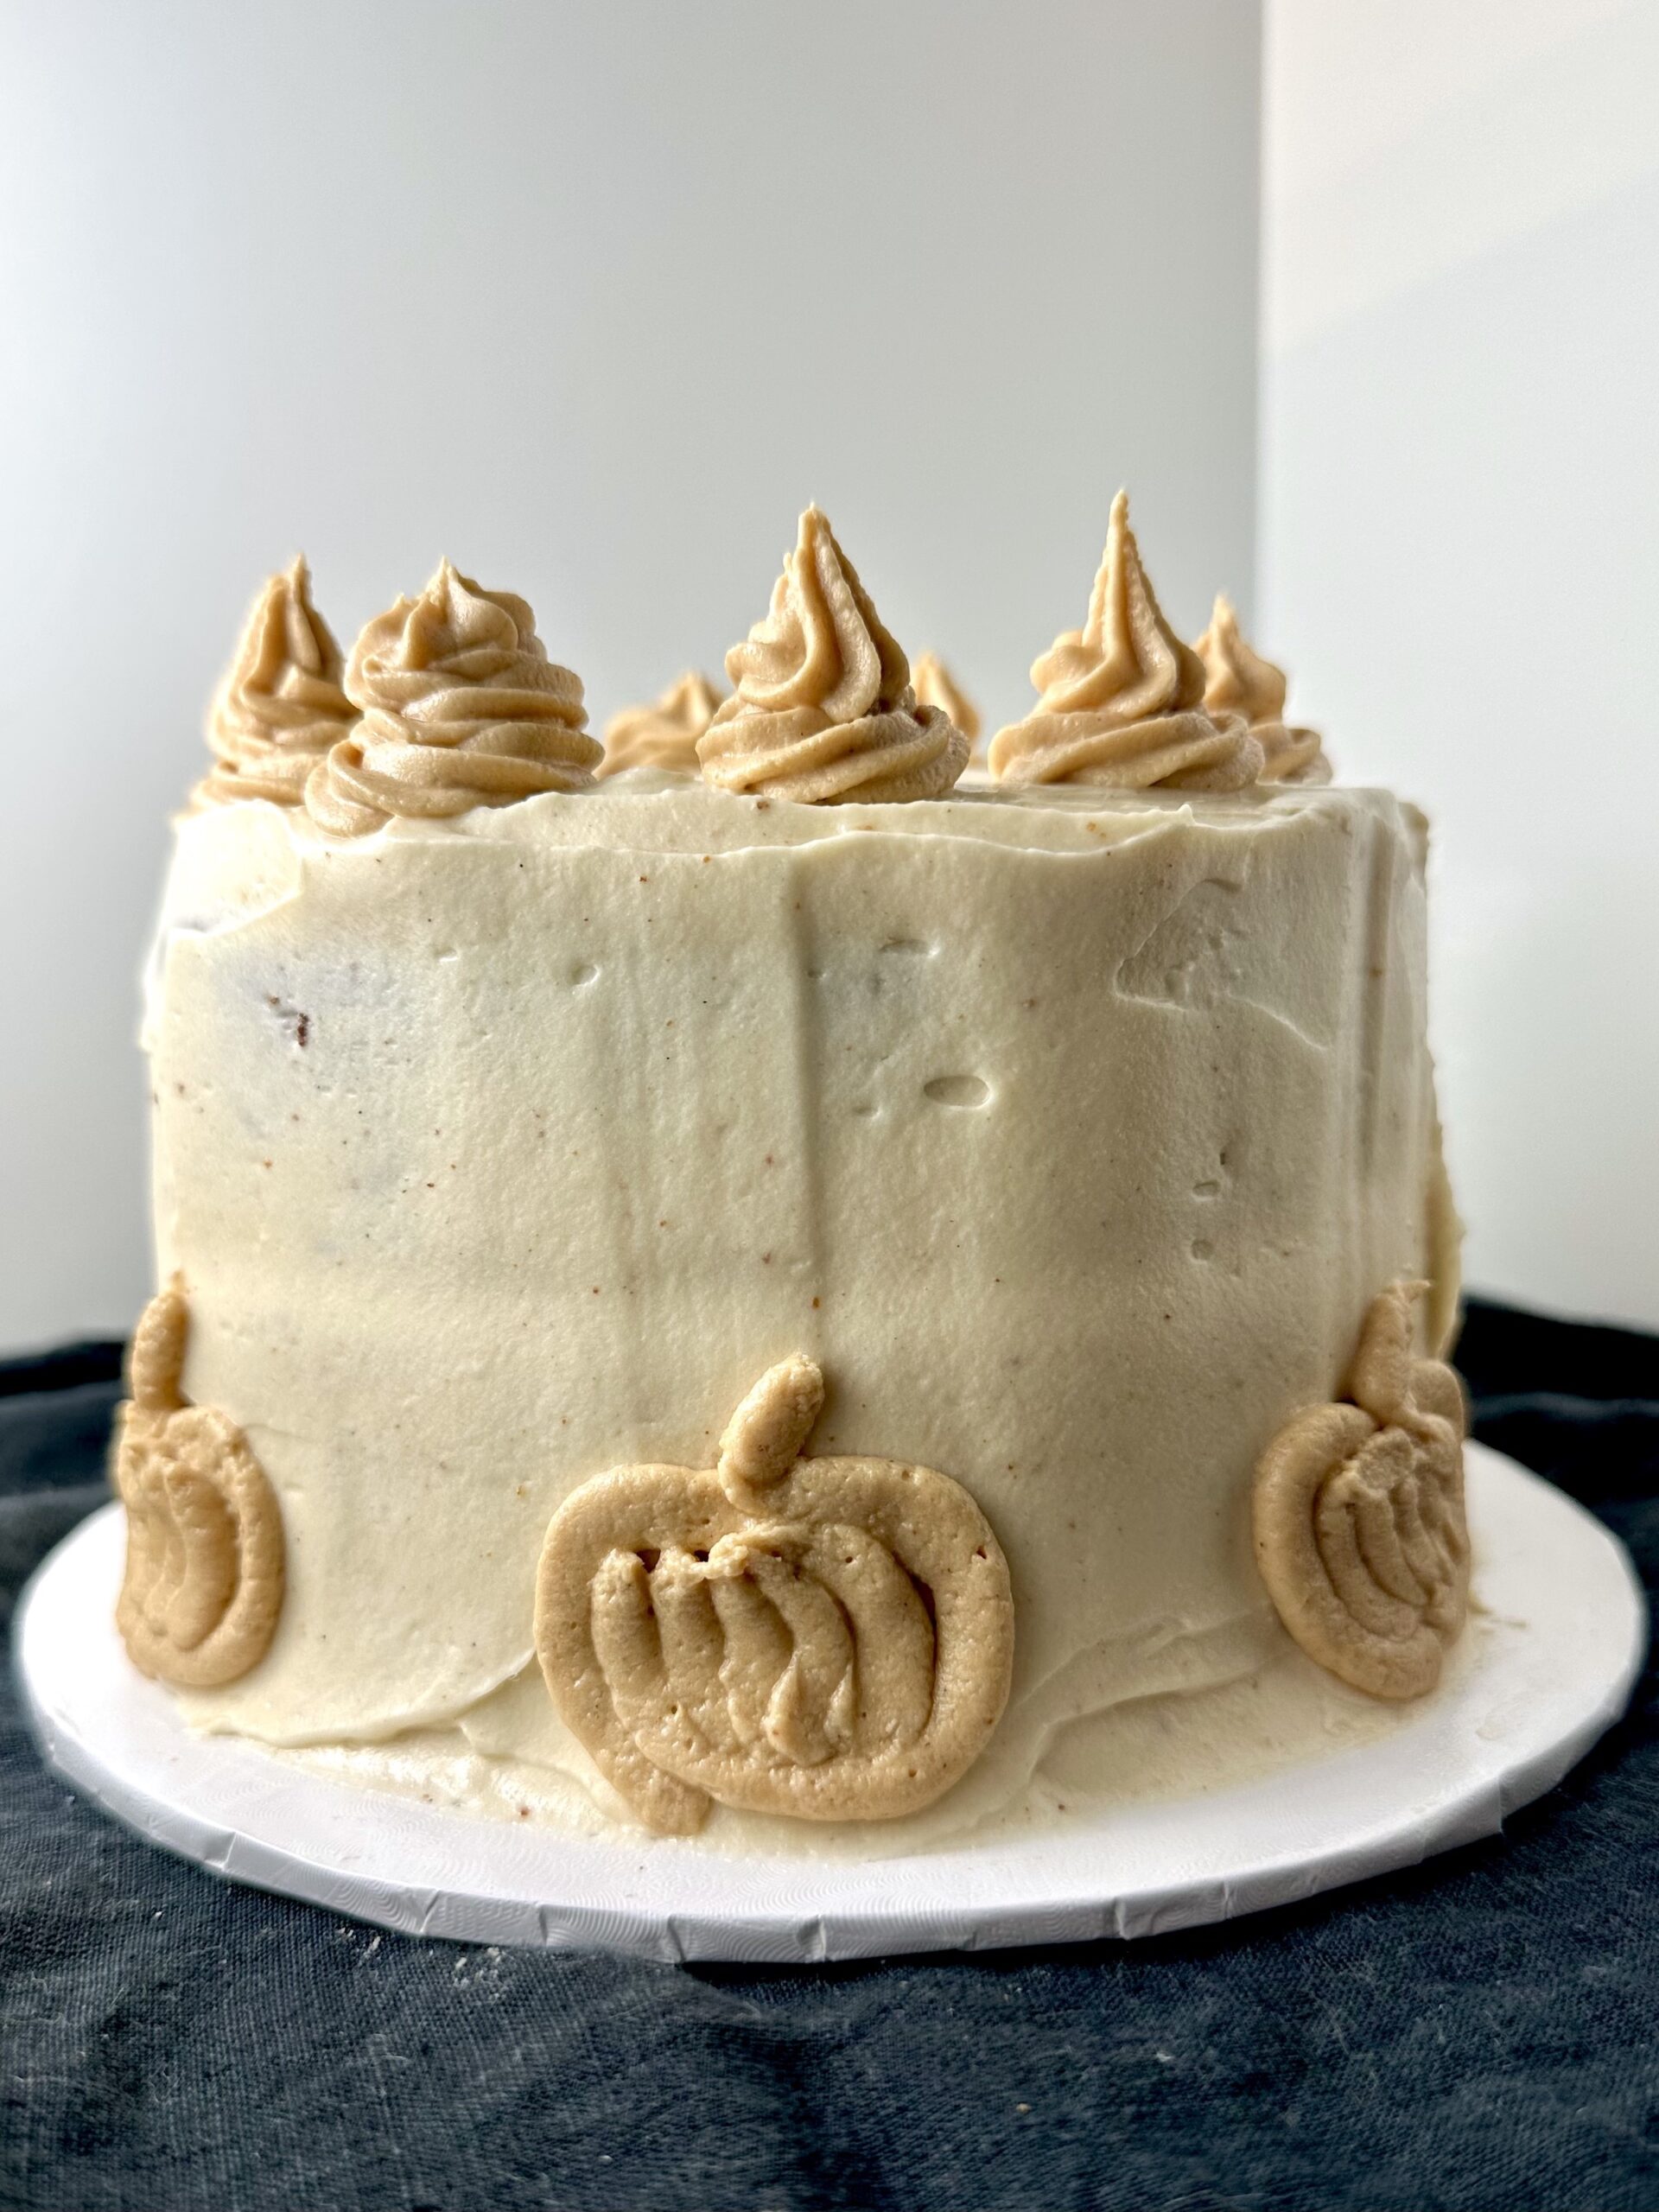
I can’t tell you how excited I am about this new pumpkin crunch cake. The cake layers are sooooooo soft and moist and pillowy, and they’re filled with comforting, warm pumpkin pie spices. The buttercream is light and creamy and luxurious, with the tang of cream cheese balanced with the malty flavor of browned butter. It pairs perfectly with the rich, dark, glossy salted butterscotch sauce. What really takes this cake to the next level is the CRUNCH of the crust. It’s a buttery crust made of warm-spiced speculoos (Biscoff) cookies, toasted then baked underneath the cake batter. The result is a heavenly bite of flavor and texture that will bring joy to a crowd every time.
Start with the Biscoff cookie crunch layer
Crush up some Biscoff cookies and mix together with softened butter, a little sugar and salt. Mold this evenly into the bottoms of the cake pans, then bake the crust for about 5 minutes on its own so it starts to get toasty and crispy. After cooling, the batter will go on top.

Next the spiced pumpkin cake layers
For the wet ingredients, you’ll need:
- neutral oil (such as almond oil, refined avocado oil, canola or vegetable oil) – I find that oil-based cakes turn out extra moist, even when eaten cold
- granulated sugar + brown sugar – The brown sugar adds extra depth of flavor and a slightly chewier texture, perfect for a hearty yet super soft pumpkin cake
- large eggs
- canned pumpkin puree
- vanilla extract
- sour cream – Incorporate this at the very end, alternating with the dry ingredients
For the dry ingredients:
- all-purpose flour
- baking powder + baking soda
- salt
- pumpkin pie spices: cinnamon, allspice, nutmeg, ginger, cloves – Definitely enough spice to shine through in the finished cake, but still balanced.


Pro tip: It may seem like a hassle, but getting the ingredients to room temperature before mixing the batter is actually worthwhile for the smoothest batter and best texture for your cake.

The batter as written makes enough for three 6-inch cakes or two 8-inch cakes. Using two 8-inch pans will result in slightly thinner cakes with a larger surface area, so expect them to bake slightly faster. I would say 34-40 minutes for three 6-inch cakes and 28-34 minutes for two 8-inch cakes. The temperature is the same for both options (350ºF). They’re done when a toothpick or fork inserted into the center comes out clean (or almost clean).
After the cakes have cooled in the pans for about 10-15 minutes, run a knife or thin rubber spatula around the edges, gently turn the cakes out of the pans, and finish cooling on a wire rack until near room temp. Then wrap those babies up in plastic wrap and put them in the fridge to chill until ready to stack.

Butterscotch sauce time!
It’s the extra oomph of flavor that puts the cake over the top. This butterscotch sauce is rich, buttery, sweet and salty with deep caramelized nuttiness. Unlike caramel (which is made with caramelized white sugar), butterscotch and toffee are made with brown sugar, giving them a touch of molasses flavor. And they are even easier than caramel to make! Just mix the ingredients in a saucepan and bring to a boil. The only difference between butterscotch and toffee is cooking temperature–toffee goes all the way to the hard crack stage, while butterscotch cooks just until it reaches a thick saucy consistency.
If you’d like, feel free to add a splash of bourbon for an extra kick.

Make the browned butter cream cheese vanilla bean buttercream
AKA the frosting of your dreams. It’s all at once creamy and light, silky smooth, tangy and nutty, indulgent but not too sweet, and rich with vanilla bean flavor. It’s one of those that I can eat with a spoon and not get tired of, which is challenging with frosting.
Start by browning the butter in a saucepan, then cooling until solidified but soft. In the meantime, bring the cream cheese to just cooler than room temperature. You’ll whip together the browned butter and cream cheese, then gradually add in powdered sugar, salt, and vanilla bean paste.

Pro tips:
- Vanilla bean paste (not extract) is what will get you the real vanilla bean flavor. It’s pricier, but a little bit goes such a long way! I’ve found this is definitely worth the splurge for any time you really want to taste vanilla.
- Take the time to sift your powdered sugar before adding it to the frosting. Clumps of powdered sugar are nearly impossible to beat out with the mixer, and nobody wants a lumpy frosting.
- If you’re going for the 3-layer cake, add the upper end of powdered sugar for a thicker consistency that’s more stabilized for building. Also chill the frosting in the refrigerator before stacking and decorating. If you add less powdered sugar, the consistency will be lighter and glossier, but less supportive for heavy cake layers.
Ready to assemble
- Make sure the cakes have had at least about 30 minutes to chill in the refrigerator before assembly. Start by leveling the tops with a serrated knife so everything stacks evenly.
- Add a coat of buttercream and an extra rim of buttercream around the perimeter to make a small well in the center.
- Drizzle on a thin layer of cooled and thickened butterscotch sauce.
- Repeat with the next layer if making a 3-layer cake.
- After adding the final cake layer, coat the sides and top with buttercream.


A note on stability…
Because the cakes are on the heavier side and have a crust, you need to be careful when stacking them. To make sure the cakes don’t slide or fall (especially for 3 layers), the following considerations are critical:
- Cake temperature: Make sure the cakes are cooled and chilled before working with them. You don’t want the frosting to melt on a warm cake!
- Frosting consistency: Adding more powdered sugar will give you a thicker frosting that holds up better under the weight of the cakes. Consider adding more if stacking 3 cakes.
- Frosting temperature: Chill it in the fridge before decorating.
- Butterscotch sauce consistency: Refrigerate until just cooler than room temperature so it’s thick and pourable, but not runny.
- During assembly, consider chilling each layer in the freezer for just a few minutes before adding on the next one, and chilling with a crumb coat before finishing the frosting and decorating.
Get creative!
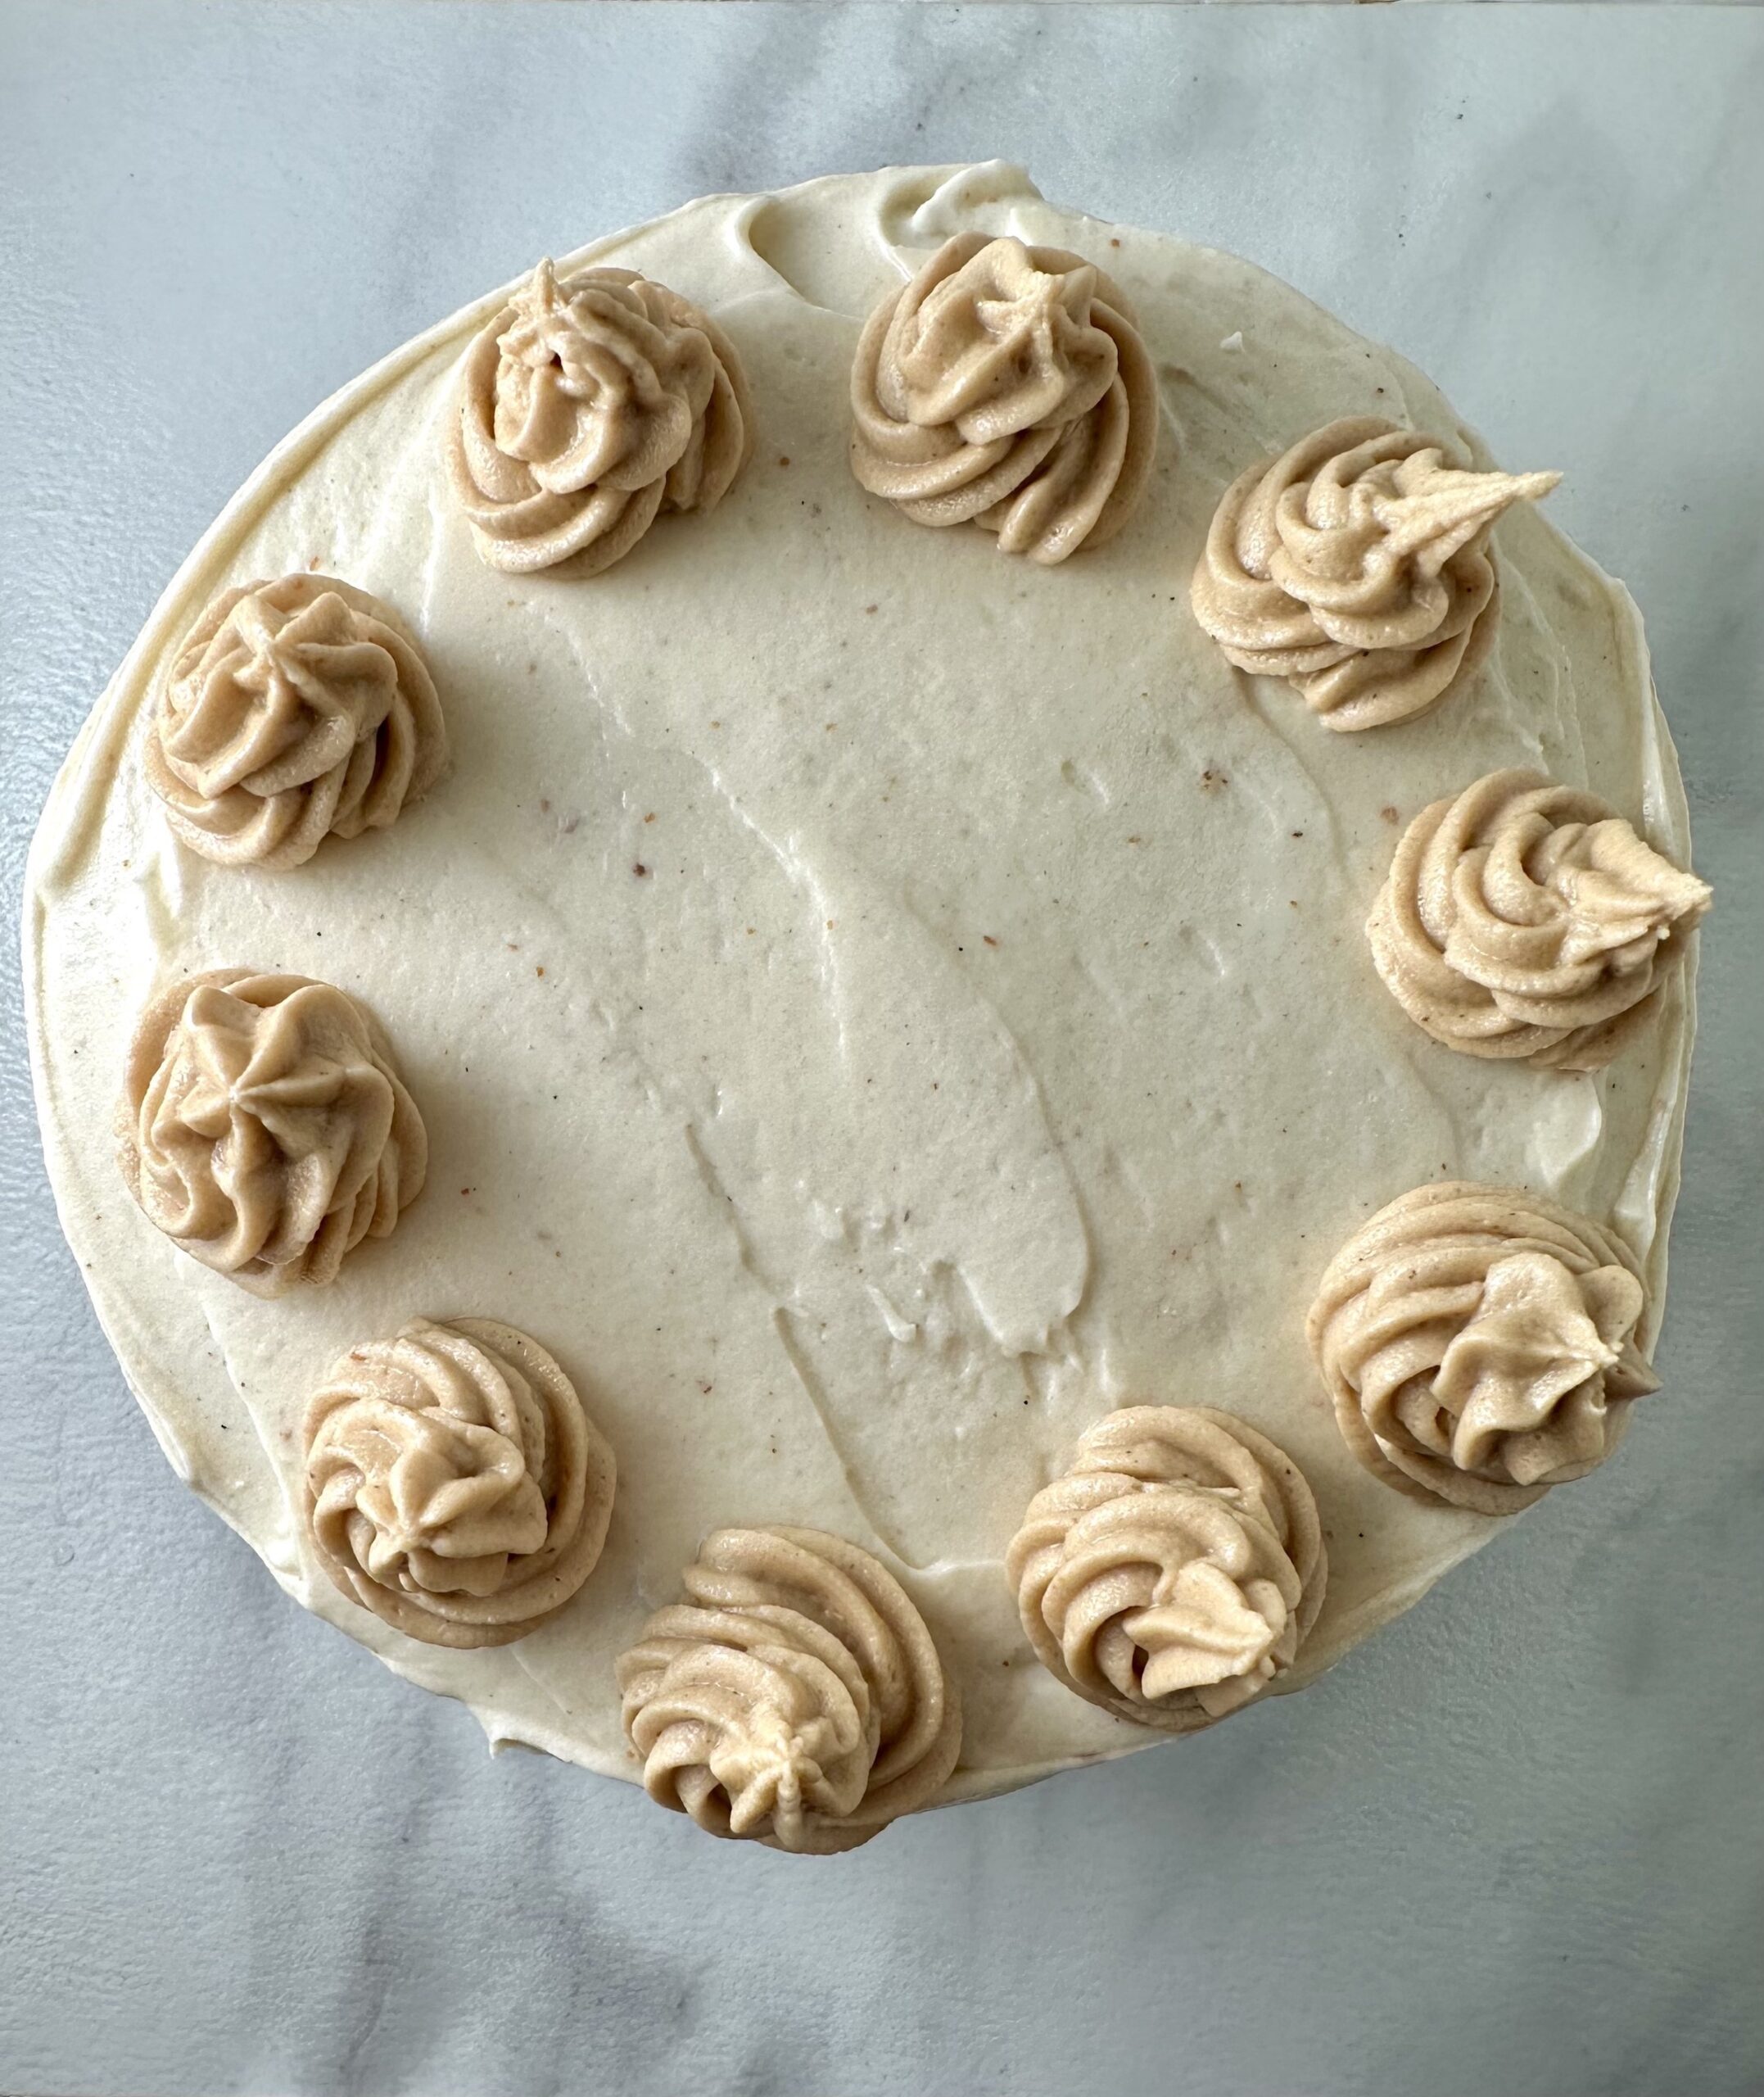
To make an easy golden brown frosting to decorate with, set aside some of the cream cheese buttercream and stir in a few spoonfuls of creamy Biscoff cookie butter and/or cooled butterscotch sauce. Pictured is with cookie butter. Great for piping!
For a drip-style cake, you can use the cooled butterscotch sauce to pour over top and let drip down the sides. Just keep in mind that if the cake sits out for too long, the sauce has the potential to thin out and run off. So give the frosted cake a chance to chill first, and add the drip close to time of serving.

Side note: In the above photos, I baked three 6-inch cakes (amounts per the recipe as written), but just used two of them for stacking and decorating. See notes above to ensure a stable cake if you make the 3-layer version. You can also do a 2-layer 8-inch cake with the recipe as written.
Pumpkin Biscoff Crunch Cake

Extra moist pumpkin spice cake layers with a crunchy Biscoff cookie crust, dreamy browned butter cream cheese buttercream, and rich homemade salted butterscotch sauce.

Notes
This recipe makes either a 3-layer 6-inch cake or a 2-layer 8-inch cake. Take note of adjusted baking times based on the size of your cakes. (2 8-inch cakes will be slightly thinner and bake faster).
The salted butterscotch recipe below will make about double the amount necessary for the cake. Leftover sauce is amazing for incorporating into other desserts.
Make sure to read the post above for more detailed tips for the best results.
Ingredients
For the Biscoff cookie crust:
- 160g Biscoff cookies
- 2 Tbsp granulated sugar
- Pinch salt
- 1/4 cup unsalted butter, room temperature
For the pumpkin cake:
- 2 cups (240g) all-purpose flour
- 1 1/2 tsp baking powder
- 3/4 tsp baking soda
- 3/4 tsp salt
- 2.5 tsp ground cinnamon
- 1/2 tsp ground allspice
- 1/2 tsp ground nutmeg
- 1/2 tsp ground ginger
- 1/2 tsp ground cloves
- 3/4 cup packed brown sugar
- 3/4 cup granulated sugar
- 2/3 cup neutral oil (such as almond, refined avocado, canola or vegetable oil)
- 1 1/3 cups canned pumpkin purèe
- 3 large eggs, room temperature
- 2 tsp vanilla extract
- 1/2 cup full-fat sour cream, room temperature
For the salted butterscotch sauce:
- 4 Tbsp unsalted butter
- 1/2 cup dark brown sugar, packed
- 1/3 tsp fine sea salt (or up to 1 tsp large flakey sea salt)
- 1/2 cup heavy cream
- 1 tsp vanilla extract
- 1/2 - 1 Tbsp bourbon (optional)
For the browned butter cream cheese frosting:
- 3/4 cup unsalted butter
- 12 ounces cream cheese, softened to just slightly cooler than room temperature
- 4.5 - 5.5 cups powdered sugar, sifted (adjust to taste and for desired consistency—more for a thicker, more stabilized buttercream)
- 1.5 tsp vanilla bean paste
- 1/4 tsp ground cinnamon, to taste
- 1/4 tsp salt, to taste
- 1/2 - 1 Tbsp cold heavy cream
Instructions
Make the crust:
- Preheat the oven to 350ºF.
- In a food processor, combine the Biscoff cookies, salt, and sugar. Pulse into a fine crumb (like sand). (Alternatively, add to a baggy and beat with a rolling pin until crushed.)
- Transfer to a mixing bowl and mix in the softened butter until the crumbs are thoroughly coated.
- Preapare three 6-inch or two 8-inch cake pans by greasing the bottom and sides with cooking spray and lining the bottoms with a parchment paper round.
- Evenly divide the crumbs between the prepared cake pans, and press down firmly to mold into a crust. Bake 5 minutes, then set aside to cool.
Make the pumpkin cake:
- In a medium sized bowl, combine flour, baking powder, baking soda, salt, cinnamon, allspice, nutmeg, ginger, and cloves. Whisk together until evenly combined.
- In a large bowl, add the brown and granulated sugars, oil, and pumpkin. Whisk thoroughly to combine. Add the eggs one at a time, mixing to completely incorporate before adding the next. Whisk in the vanilla.
- Add 1/3 of the dry ingredients to the wet mixture, mix to combine, then stir in 1/2 of the sour cream. Continue to alternate until all ingredients are evenly combined. Scrape down the sides and bottom of the bowl. Stir a few more times to ensure there are no lumps in the batter.
- Divide batter evenly between the cake pans over the cooled crust. Bake at 350ºF for 28-34 min for two 8” cakes or 34-40 minutes for three 6” cakes, until a toothpick inserted in the center comes out clean. Allow the cakes to cool for about 10-15 minutes in the pans, then release the sides with a knife or spatula, turn the cakes out onto a wire rack, and finish cooling completely.
- Wrap each cake layer in plastic wrap and transfer to the refrigerator to chill before assembly.
Make the butterscotch sauce:
- Melt the butter in a medium saucepan over medium heat. Add the brown sugar, heavy cream, and salt. Stir the mixture with a rubber spatula until fully blended. Bring the mixture to a boil and boil for 5-6 minutes, occasionally scraping down the sides of the pan.
- Remove the sauce from the heat, then stir in the vanilla (and bourbon if desired). Transfer to a heat-proof container to cool to room temperature. (It will thicken as it cools.)
- If not using immediately, store covered in the refrigerator. Bring to room temperature and stir when ready to use. The consistency should be thick but just pourable.
Make the frosting:
- Brown the butter: Add the butter to a small saucepan over medium-low heat. Swirl the pan as the butter melts. Continue to cook, stirring occasionally, until the butter bubbles, foams, then turns golden brown (about 5-8 minutes after it begins bubbling). It should smell toasty and nutty, and you should see brown milk solids at the bottom. Pay close attention so it doesn’t burn. Remove the saucepan from heat. Carefully pour the browned butter into a small heat-proof container to cool, making sure to include all the browned bits at the bottom. When no longer hot, transfer the browned butter to the refrigerator until solidified but still soft. Set out to make the frosting.
- Add the cooled/solidified browned butter and softened cream cheese to the bowl of an electric stand mixer or large mixing bowl (if using a handheld mixer). Beat together 2-3 minutes on medium-high speed, until fluffy.
- Sift the powdered sugar into a separate bowl.
- To the whipped browned butter and cream cheese, add the powdered sugar 1/2 cup at a time. (5-5.5 cups for a thicker frosting that’s more stable for building, 4.5 cups for a softer frosting.) With each addition, start at low speed to incorporate, then increase to medium-high speed. After all the sugar is incorporated, beat another 3-4 minutes, stopping a few times to scrape down the sides of the bowl. Add the salt (to taste), vanilla, and heavy cream (adjusting the amount as needed for desired consistency). Beat until smooth. Finally, stir the frosting by hand a few times to remove excess air.
- Chill the frosting in the refrigerator to help it set up before frosting the cake.
- For decorating purposes, set aside a smaller portion of frosting and stir in a few spoonfuls of creamy Biscoff cookie butter and/or the thickened salted caramel sauce.
Assemble:
- After the cakes are cooled and chilled, use a serrrated knife to level the tops of the cakes.
- Place the first cake layer crust-side down on a cake board.
- Cover the top with a layer of buttercream, then pipe a rim of buttercream around the perimeter.
- Drizzle a thin layer of salted butterscotch sauce in the center. Repeat steps 2-4 with the second cake layer if making a 3-layer cake.
- Place the last cake layer on top, crust-side down. Cover the top and sides of the cake with a thin coat of buttercream, then transfer to the refrigerator for a few minutes to chill.
- Finish frosting the cake with buttercream.
- If desired, use the buttercream mixed with cookie butter and/or caramel for piping decorations.
- Enjoy at room temperature. Store any leftover cake in the refrigerator. Individual slices can be wrapped in plastic wrap, placed in an air-proof container, and stored in the refrigerator for up to 5ish days or the freezer for up to 3ish months.